Tutorial: Using Cerbos with FusionAuth
| This documentation is for an as-yet unreleased version of Cerbos PDP. Choose 0.53.0 from the version picker at the top right or navigate to https://docs.cerbos.dev for the latest version. |
An example stack of integrating Cerbos with an Express server using FusionAuth for authentication.
This example is based off the FusionAuth/fusionauth-example-node repo.
Getting started
-
Clone the repo
git clone git@github.com:cerbos/express-fusionauth-cerbos.git
Start Stack
Start up the stack docker compose up - this will take some time to
pull down all the images and launch them, but once started the following
services will be running.
-
FusionAuth
http://localhost:9011 -
Cerbos
http://localhost:3592/ -
Node App
http://localhost:8080/ -
Postgres DB for FustionAuth on port
5432
Configure FusionAuth
This example is based off the
FusionAuth 5
Minute Guide - and most of the steps have bee handled by the
docker compose setup.
The only manual steps required are creating the application. To do this,
open up http://localhost:9011 and complete the
setup wizard, then:
Once we arrive in the FusionAuth admin UI, the first thing we need to do is create an Application. An Application is something that a user can log into. This is the application we are building or that we are migrating to use FusionAuth. We’ll click the Application menu option on the left side of the page or the Setup button in the box at the top of the page.
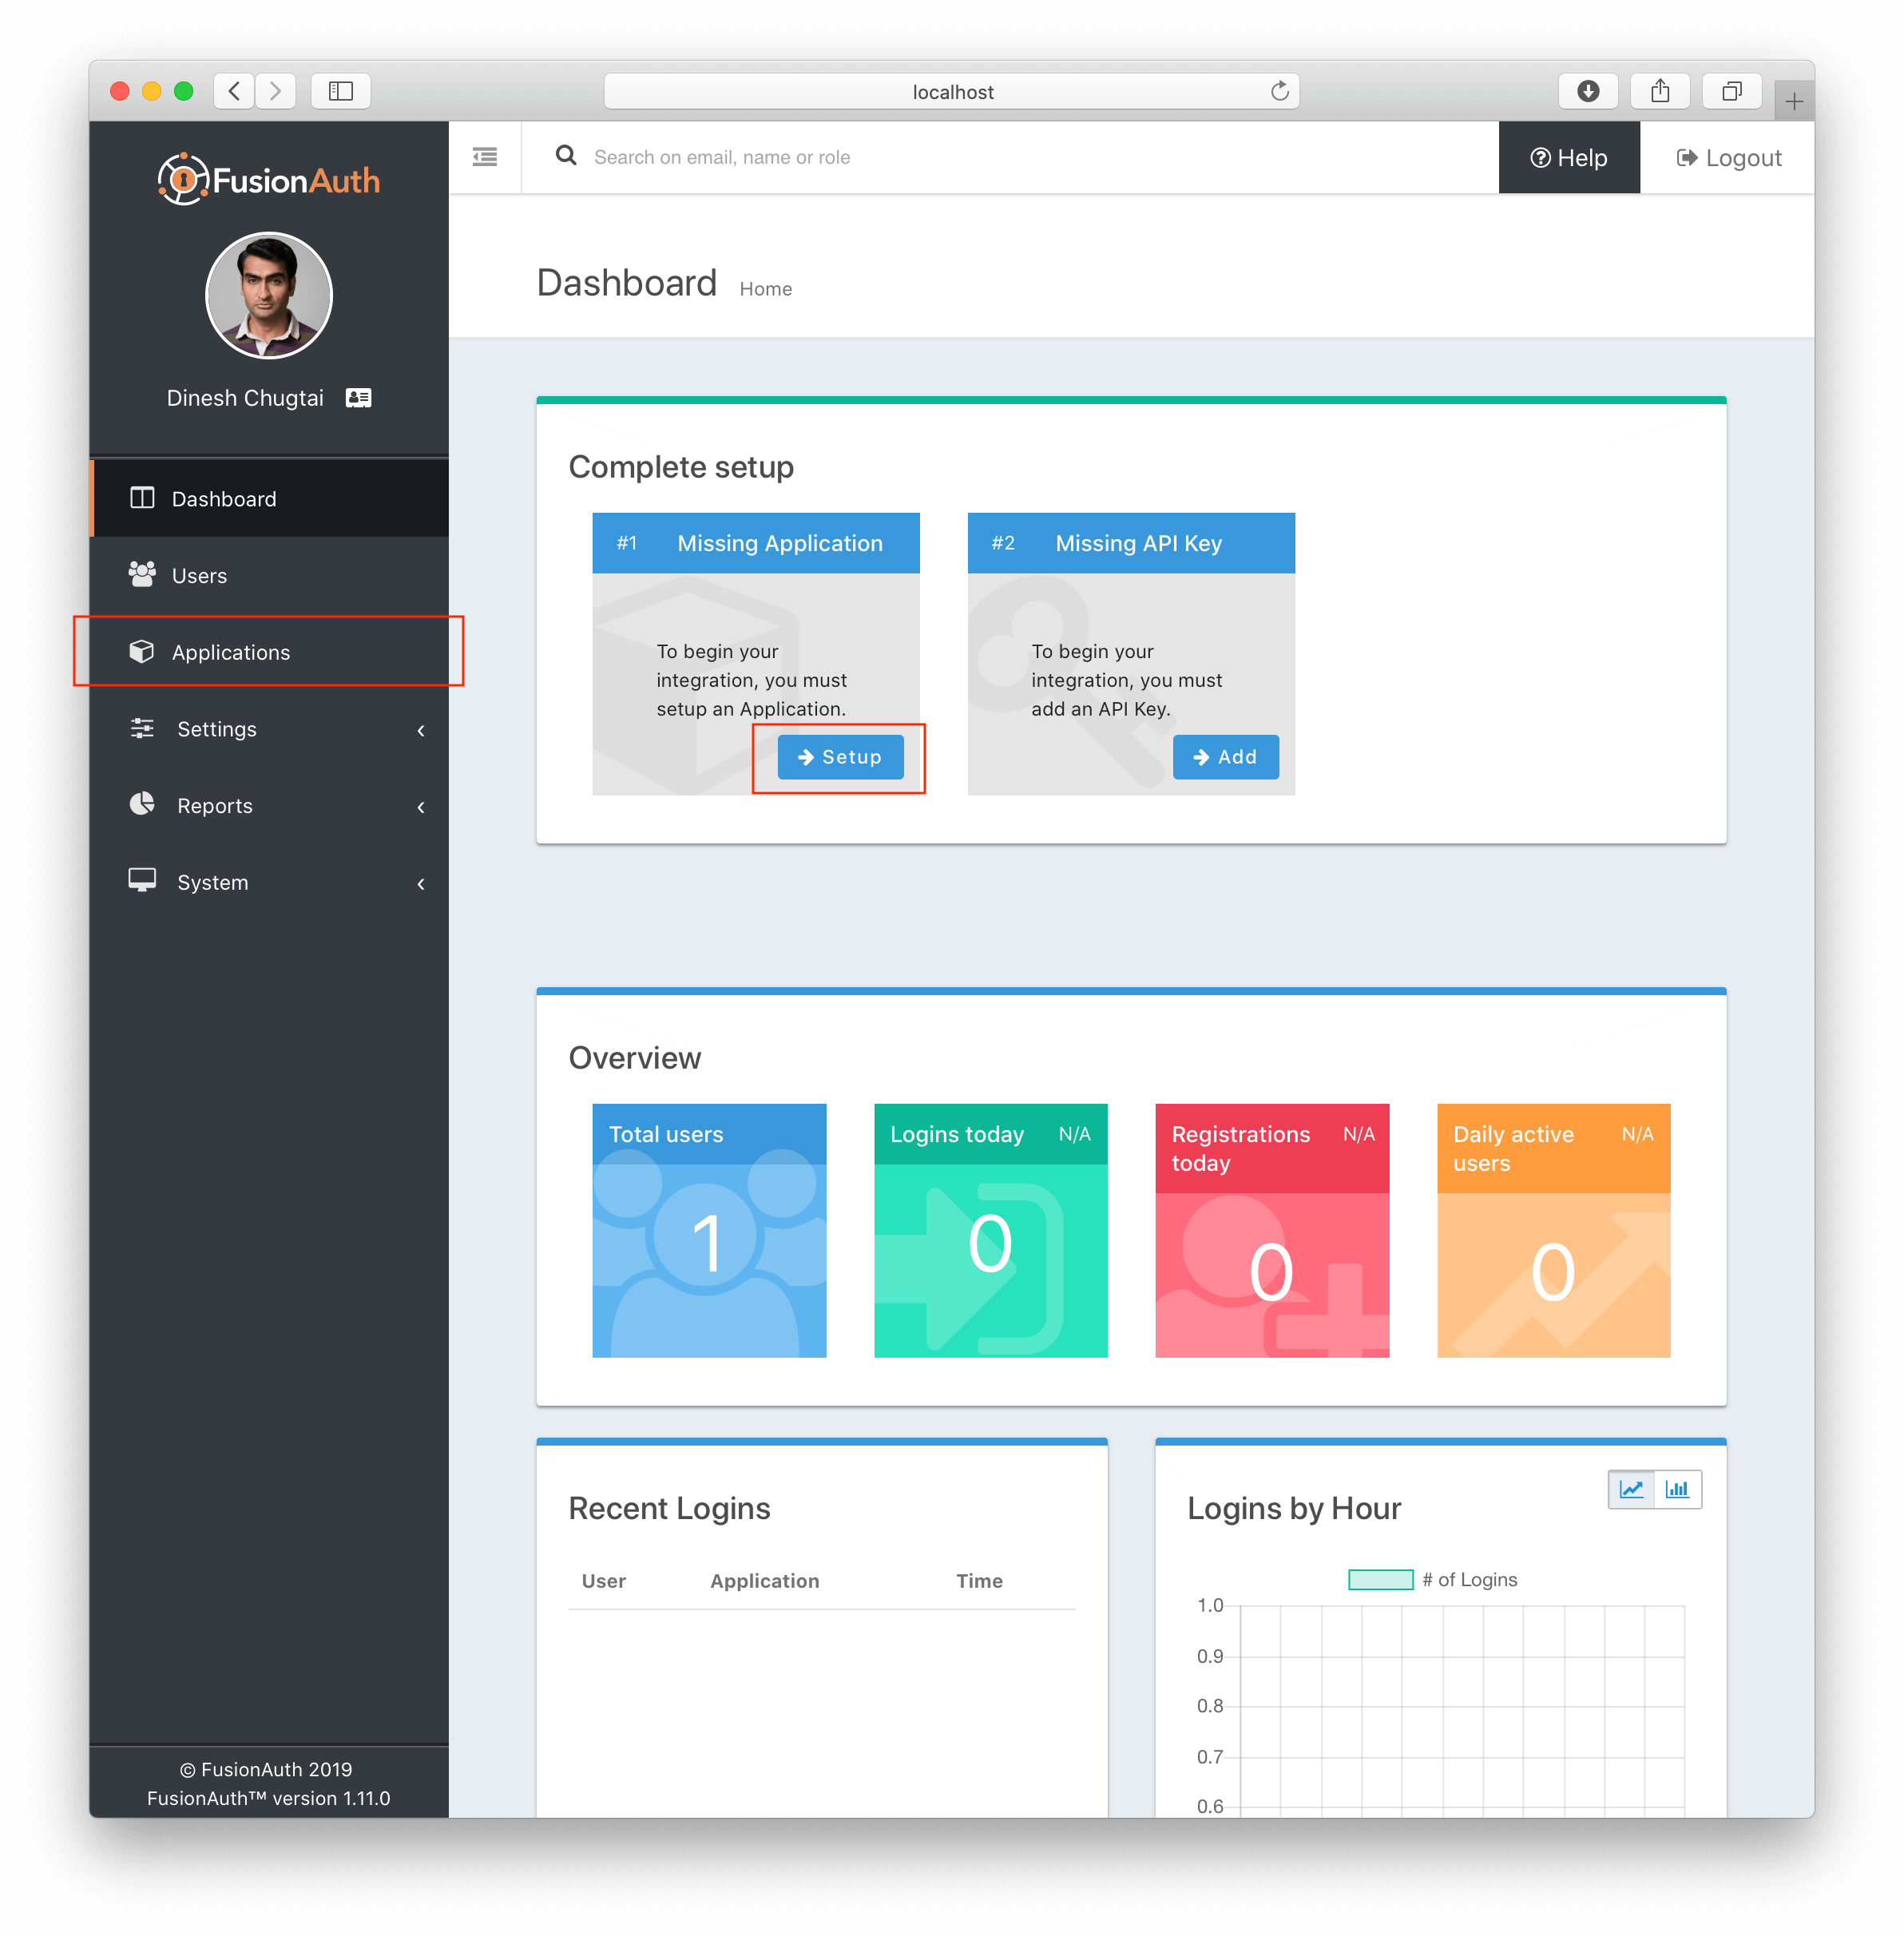
This will take us to the listing page for Applications. Next, we’ll click the green plus button (the add button) at the top of the page:

On the Application form, we’ll need to provide a name for our Application (only used for display purposes) and a couple of items on the OAuth tab. We’ll start with a simple setup that allows existing users to log into your application. Therefore, we won’t need to define any roles or registration configuration. If we click on the OAuth tab, we’ll see these options:
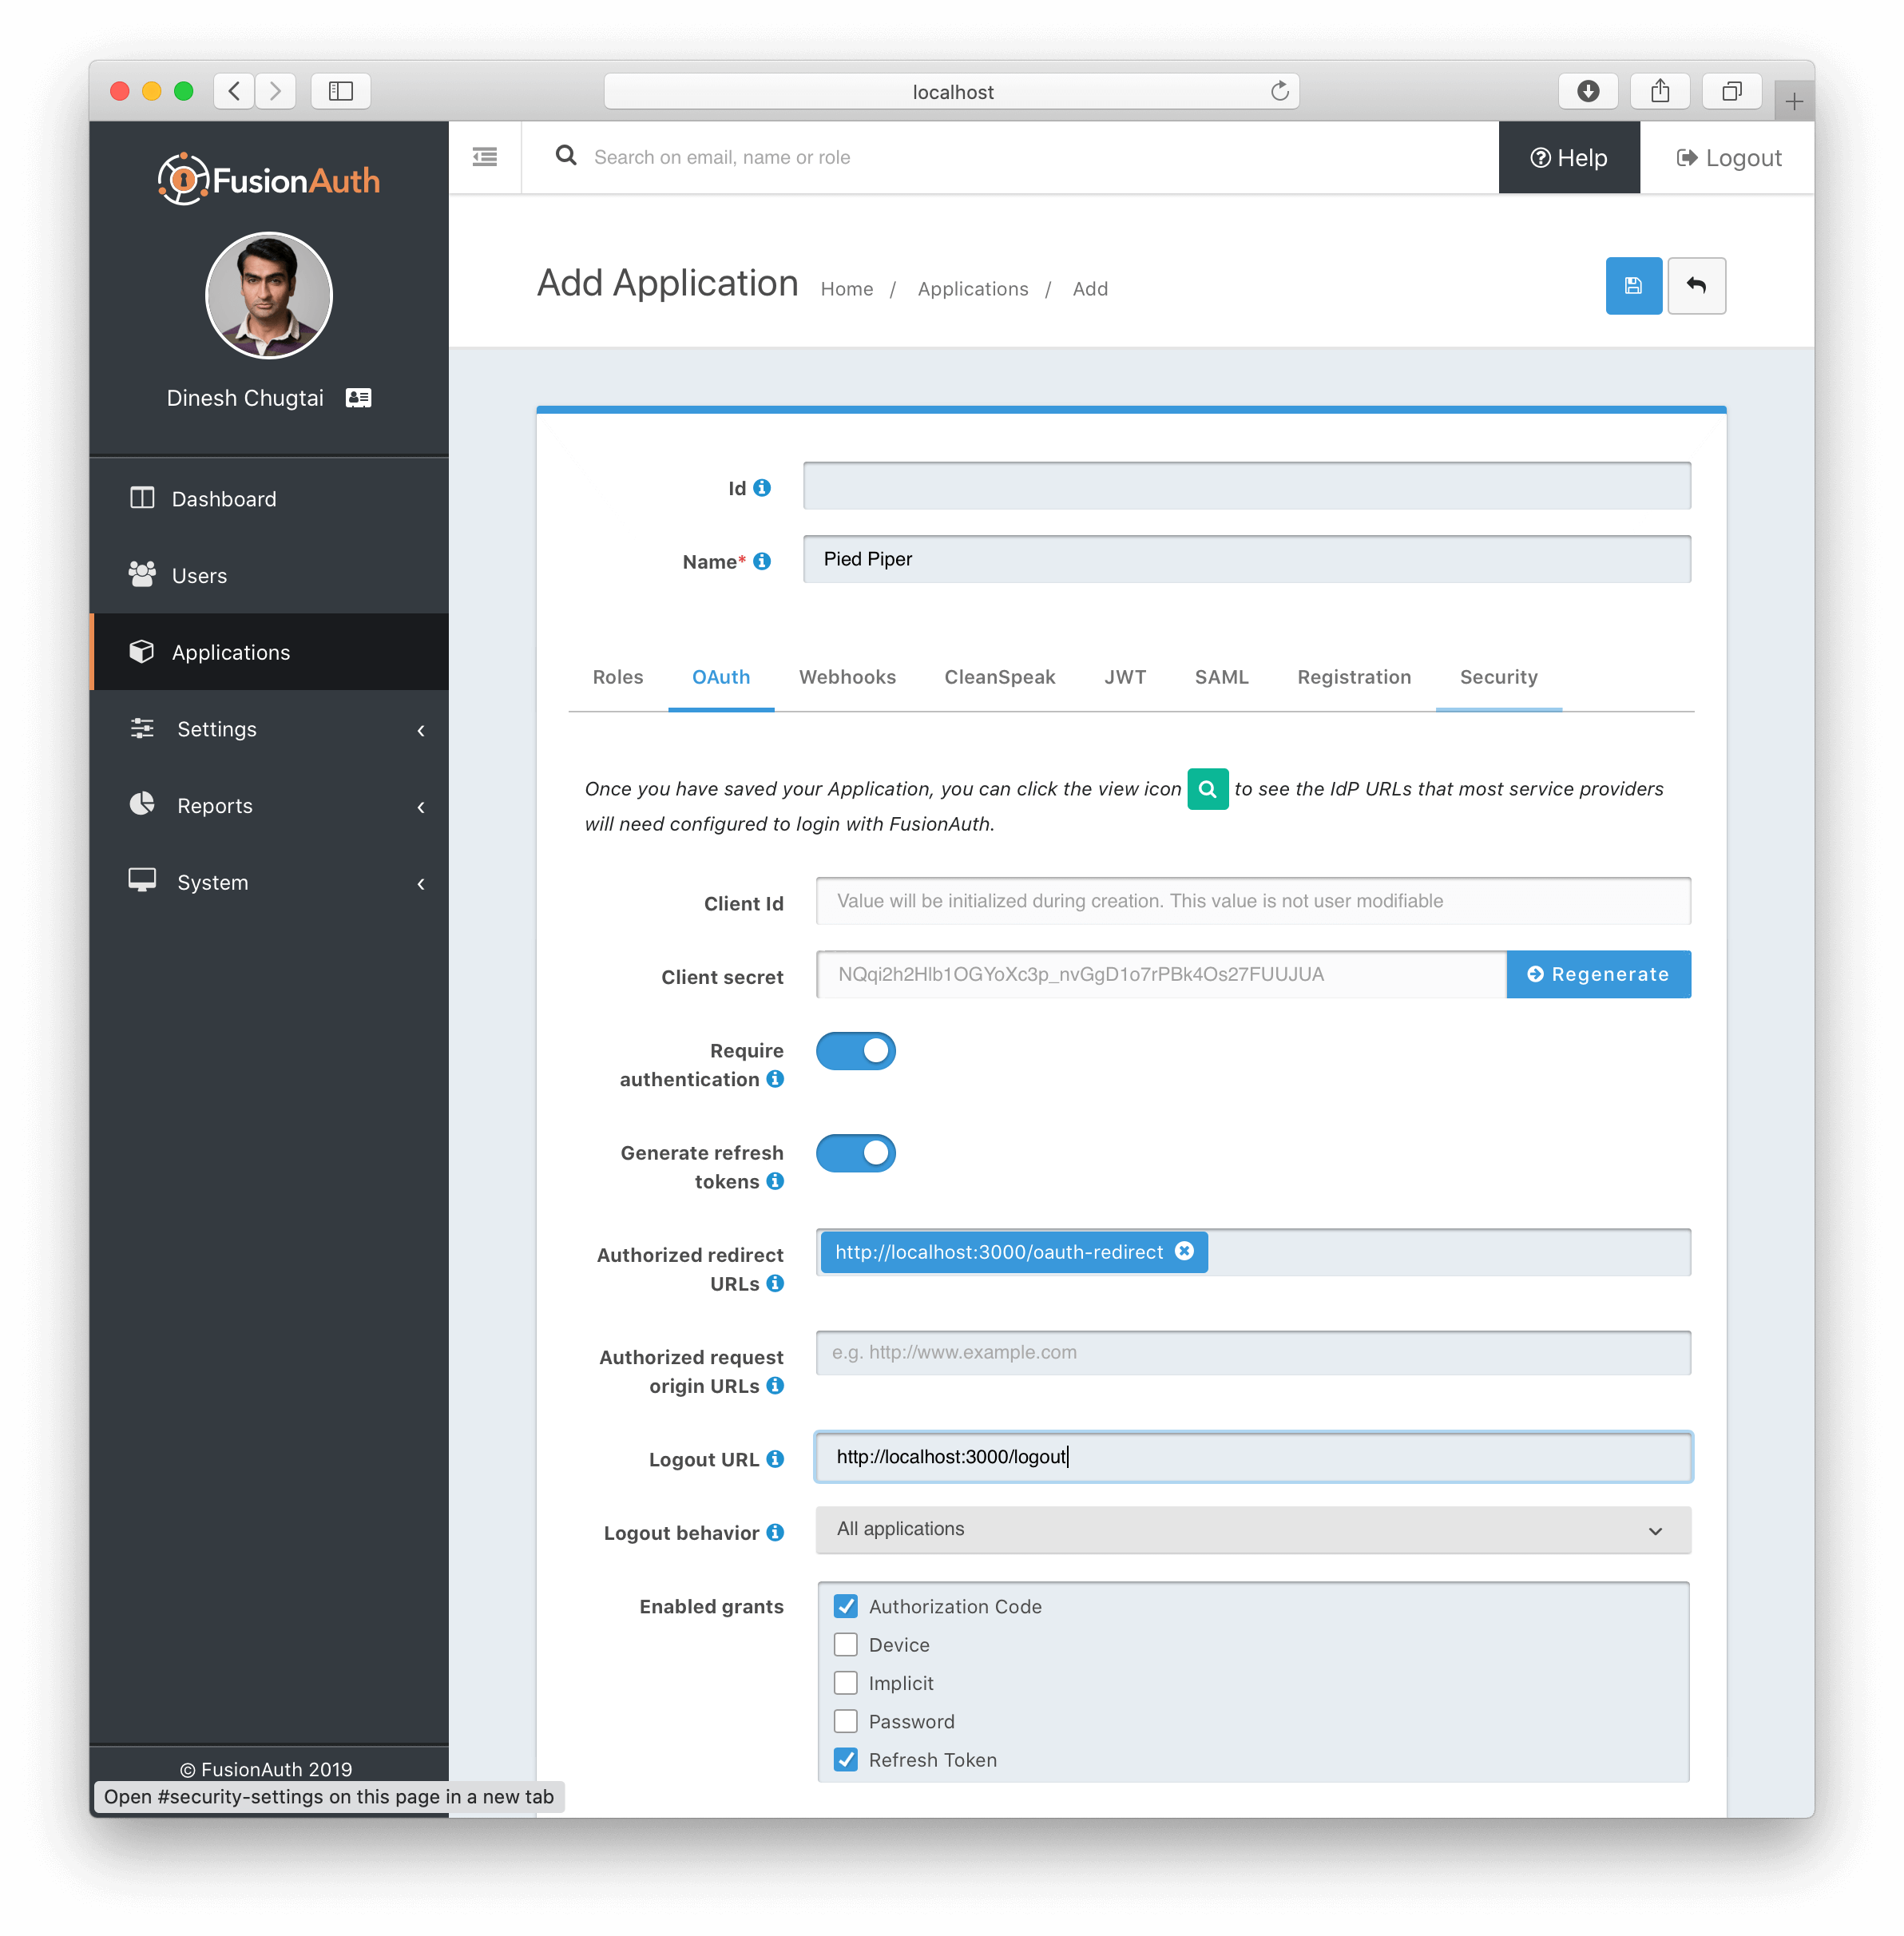
Most of the defaults will work, but we also need to provide these items:
-
An authorized redirect URL. This is the route/controller in our application’s backend that will complete the OAuth workflow. This is also known as the 'Backend for Frontend' or BFF pattern, and is a lightweight proxy. In our example, we set this to
http://localhost:8080/auth/callback. We’ll show some Node.js example code below for this route. -
Optionally, we can specify a valid Logout URL. This is where the user will be redirected to after they are logged out of FusionAuth’s OAuth front-end: our application.
-
We need to ensure that the Authorization Code grant is selected in the Enabled Grants.
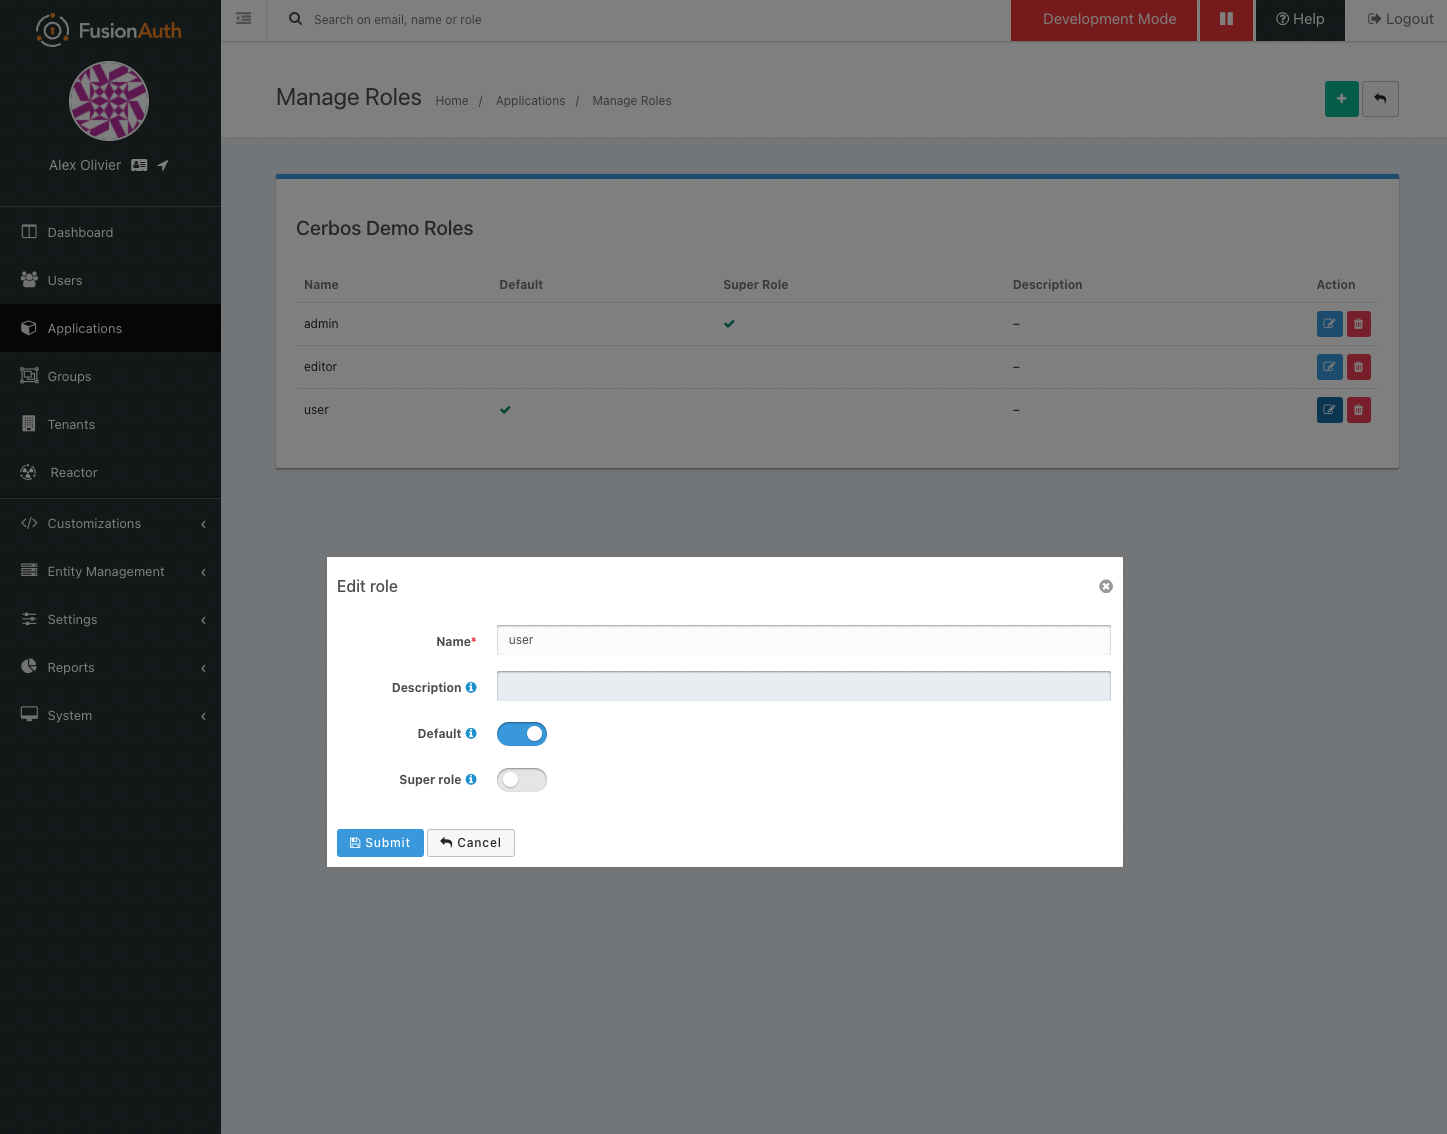
Next we need to add the roles that will be used by our policies. Back on
the application listing page press the 'Manage Roles' button next to our
application and add roles for user and editor (admin should already
exist). These roles will be passed back with the user information to our
application, and then passed onto Cerbos for use in authorization
decisions.
Once we have all of this configured, we can then copy the Client ID and Client Secret and move to the next step.
Configure Node App
Now that our application has been created, we need to add the Client ID
and Client Secret from FusionAuth into the top of app/index.js (line
12 & 13). These will be used to identify the app through the login flow.
Test the app
Now that everything is wired up you should be able to goto
http://localhost:8080 and press the login link
to authenticate with your FusionAuth account.
Policies
This example has a simple CRUD policy in place for a resource kind of
contact - like a CRM system would have. The policy file can be found
in the cerbos/policies folder
here.
Should you wish to experiment with this policy, you can try it in the Cerbos Playground.
The policy expects one of two roles to be set on the principal - admin
and user. These roles are authorized as follows:
| Action | User | Admin |
|---|---|---|
list |
Y |
Y |
read |
Y |
Y |
create |
Y |
Y |
update |
If owner |
Y |
delete |
If owner |
Y |
Request Flow
-
User access the application and clicks
Login -
User is directed to the FusionAuth UI and authenticates
-
A token is returned back in the redirect URL to the application
-
That token is then exchanged for the user profile information
-
The user profile from FusionAuth being stored (user Id, email, roles etc).
-
Any requests to the
/contactsendpoints fetch the data required about the resource being accessed from the data store -
Call the Cerbos PDP with the principal, resource and action to check the authorization and then return an error if the user is not authorized. The Cerbos package is used for this.
---
const allowed = await cerbos.check({
  principal: { //pass in the Okta user ID and groups
    id: req.userContext.userinfo.sub,
    roles: req.userContext.userinfo.groups,
  },
  resource: {
    kind: "contact",
    instances: {
      //a map of the resource(s) being accessed
      [contact.id]: {
        attr: contact,
      },
    },
  },
  actions: ["read"], //the list of actions being performed
});
if (!allowed.isAuthorized(contact.id, "read")) { return res.status(403).json({ error: "Unauthorized" }); } --- Implementation at this stage will be dependant on your business requirements.